MX Invoice Settings
Configure invoice, recurring, tax, and discount settings.
Streamline how your team creates and manages invoices. This page covers the Invoice app settings in PCE — defaults for invoice/recurring, tax catalog, and discounts — so you can set consistent rules and reduce setup time.
Prerequisites and Limitations
- Prerequisites: Invoice app installed, API credentials, and a merchant enabled for card and/or ACH.
- Limitations: Tender types, ACH, and notification channels may vary by gateway and region. Tax and discount behavior depends on your configured categories and approval rules.
Settings Overview
The Invoice app exposes three areas:
| Area | What You Configure |
|---|---|
| Invoice & Recurring | Default terms, click‑to‑pay behavior, reminders, recurring schedules, and templates. |
| Sales Tax | Tax rates and tax categories used on invoices and recurring plans. |
| Discounts | Item-, order-, tag-, and collection‑level discounts, approval and timing rules. |
Where to find it: In Settings, select the Invoice tile. Tabs at the top separate Invoice and Recurring options.
Invoice Tab
Invoice settings are organized into three sections.
Default Terms
Default payment terms appear on every new invoice; you can override them when creating an invoice.

Sending Invoices (Click‑to‑Pay)
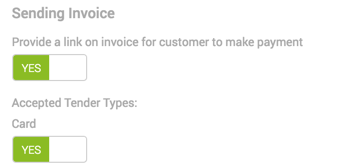
Enable a pay link on sent invoices so customers can settle balances online. Use the Yes/No toggle to include a payment link and choose which tender types are allowed (card and/or ACH). You can override the default per invoice.
Reminder Notifications
Send automatic reminders before due dates and after invoices become past due.
| Trigger | How It Works | Configuration |
|---|---|---|
| Before Due Date | Sends a reminder n days before the invoice or plan is due. | Enter the number of days before due; use 0 to disable. |
| After Due Date | Sends a reminder n days after the invoice or plan becomes past due. | Enter the number of days after due; use 0 to disable. |

Recurring Tab
Recurring settings define defaults for subscriptions billed on a schedule.
Send Customer Authorization
Set your default for requiring customers to authorize a recurring charge before activation. This is a default only — you can change it per contract.

Schedule Defaults
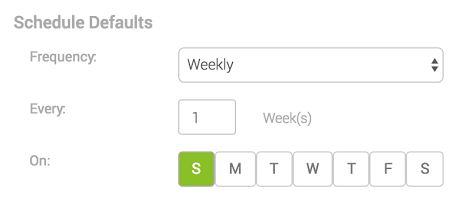
Choose the most common billing frequency to speed up contract setup. This default can be changed on any contract.
Recurring Plan Templates
Create templates for frequently used recurring plans to prefill schedule, items, taxes, and terms.

Template Fields
| Field | Description |
|---|---|
| Plan Name | Name you’ll enter on a contract to apply this template. |
| Schedule | Billing frequency for the plan. |
| Occurrences | Number of times to bill. Leave blank for unlimited until canceled. |
| Terms | Days the subscriber has to pay after the scheduled date. |
| Items | Line items with qty and price; expand a line to add tax and discounts. |
| Memo | Optional message shown to the customer. |
Create a template: Select + Add Plan, complete the fields, then Save.
Sales Tax
Manage the tax catalog used by invoices and recurring plans. In Settings, select the Sales Tax tile (near the bottom of the page).
What You’ll See
| Column | Description |
|---|---|
| Tax Name | The tax rate name shown at checkout and on receipts. |
| Description | Internal notes about the tax rate. |
| Rate % | Percentage charged for this tax. |
| Categories | Category groups the tax belongs to; use categories to apply multiple related taxes quickly. |
Create a New Tax Rate

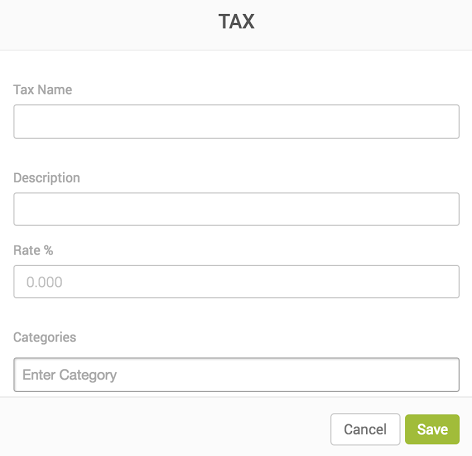
| Field | Description |
|---|---|
| Tax Name | Visible to customers; make it specific to what’s being charged. |
| Description | Internal, optional notes about the rate. |
| Rate % | Percentage to charge. |
| Categories | One or more groups for faster assignment on invoices and plans. If omitted, the rate becomes the default category. |
View and Edit a Tax Rate
Select a tax name to open details. Edit fields as needed and select Save to apply changes.
Discounts
Configure discount rules for items, orders, tags, and collections.
What You’ll See
| Column | Description |
|---|---|
| Discount Name | Internal name used to find the discount at checkout. |
| Discount Amount | Percent or fixed amount to reduce. |
| Level | Where it applies — item, order, tag, or collection. |
| Approval | Whether supervisor approval is required. |
| Automatic | Applies automatically when criteria are met. |
| Start Date / End Date | Time‑bound window; leave blank for ongoing. |
| Barcode | System‑generated or manual number. |
Create a New Discount

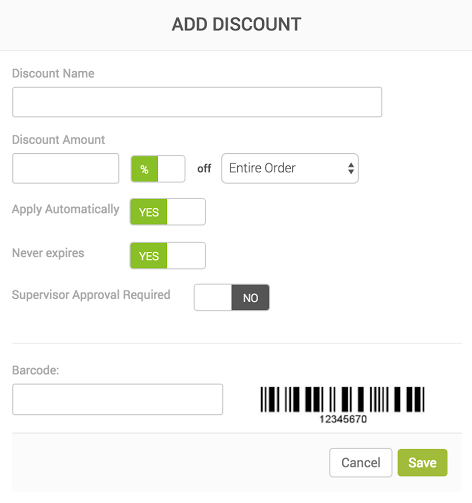
| Field | Description |
|---|---|
| Discount Name | Internal label; not shown to customers. |
| Discount Amount | Percentage or fixed amount off the total or item price. |
| Level | Choose Order, Item, Tag, or Collection. |
| Automatic | Auto‑apply when criteria match. |
| Never Expires | Set to Yes for ongoing (e.g., Military). Set No to define start/end dates. |
| Supervisor Approval Required | Require a supervisor to approve before applying. |
| Barcode | System‑generated or enter your own number. |
Search and Filter
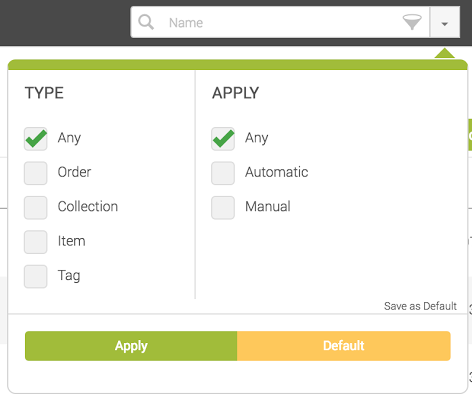
Use the search box to find discounts by name. Open the filter panel to select criteria and select Apply. To reset, choose Default and Apply. Use Save as Default to keep your preferred filters for next time.
View and Edit a Discount
Select a discount name to view details in a pop‑up. Make changes and select Save to apply them.
See also
Invoice Grid — Instruction Video
Updated 3 days ago